Deploying Time Sheet Tracking to SCRUM Projects in Rational TeamConcert
Rational Team Concert gets more and more traction in the industry. It is a collaborative application lifecycle management product that allows a team of developers, project managers, designers, testers, analysts, executives, and stakeholders to work in unison. It works in harmony with other DevOps concepts such as:
It is geared towards agile development, and as such is itself an agile tool able to adapt to a constantly changing industry.
One feature that the RTC project team has recently baked into the project is the ability to track time (as in timesheets) on a project, and work item basis. Project managers need to track not just actual time, but often time that gets billed to a project to compare with vendor invoices. This features is enabled on the “Formal Project Management” template, which is an RTC process template geared for large companies that are migrating away from waterfall processes, but not quite ready for full on agile. The SCRUM template however, does not have the feature out of the box, but it can be deployed by following these instructions.
Note, that you can do this on a project template, or if you are just getting started, you can create a project template once you make the following updates. You also need to have the Data Warehouse functions of RTC setup and installed to make this work properly.
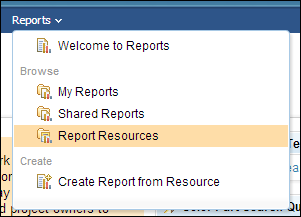 In the upper right hand corner, click on the icon to Deploy New Resources.
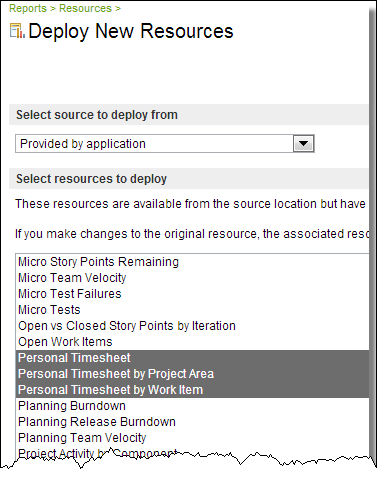
Personal Timesheet

 Next you will need to update the Process Configuration for your SCRUM project in the Eclipse client. Go to your Team Artifacts view. Make sure your project is listed. Then right click on the project and select Open from the context menu.
<tab id="com.ibm.team.workitem.tab.timesheet" layout="builtInOverviewLayout">
 <section sectionId="com.ibm.team.workitem.section.timesheet" slot="description" title="Time Tracking"/>
 <section sectionId="com.ibm.team.workitem.section.timesheetQuickInformation" slot="quickInfo" title="Timesheet Entries"/>
</tab>
<section id="com.ibm.team.workitem.section.timesheet">
 <presentation kind="com.ibm.team.tpt.kind.internal.timeSheet"/>
</section>
<section id="com.ibm.team.workitem.section.timesheetQuickInformation">
 <presentation kind="com.ibm.team.tpt.kind.internal.timesheetEntries"/>
</section><editor id="com.ibm.team.workitem.editor.default">
<tab tabId="com.ibm.team.workitem.editor.default.internalHeader" title="none"/>
<tab tabId="com.ibm.team.workitem.tab.overview" title="Overview"/>
<tab tabId="com.ibm.team.workitem.tab.links" title="Links"/>
<tab tabId="com.ibm.team.workitem.tab.approvals" title="Approvals"/>
<tab tabId="com.ibm.team.workitem.tab.customAttributes" title="Custom">
<property key="hideIfEmpty" value="true"/>
</tab>
<tab tabId="com.ibm.team.workitem.tab.history" title="History"/>
<tab tabId="com.ibm.team.workitem.tab.timesheet" title="Time Tracking"/>
</editor><presentation attributeId="com.ibm.team.workitem.attribute.timespent" kind="com.ibm.team.apt.kind.internal.timespent"/>to:
<presentation attributeId="com.ibm.team.workitem.attribute.timespent" kind="com.ibm.team.apt.kind.internal.timespent">
 <property key="readonly" value="true"/>
</presentation>Process configuration instructions courtesy of the IBM Infocenter on Rational Collaborative Lifecycle Management 4.0.3